まず、ここに来たばかりの人を歓迎します!Ionic Frameworkは、 iOS, Android, Electron, Web上で動作するアプリを構築するための、無償でオープンソースのコンポーネントライブラリです。使い慣れたテクノロジ(HTML、CSS、JavaScript)を使用してアプリケーションを一度作成したら、任意のプラットフォームに展開することができます。
UIコンポーネントに加えて、Ionic Frameworkは新しいアプリを作るためのコマンドラインツールを提供し、サポートしている様々なプラットフォームにデプロイすることができます。
このガイドでは、Ionic Framework特有の機能を含め、VueとIonic Frameworkの基本について説明します。Vueに精通している方は、ガイドを楽しみ、Ionic Frameworkについて新しいことを学んでください。どちらにも詳しくない方はご安心ください!このガイドでは、基本的なことを説明し、アプリケーションを起動して実行するのに十分な情報を提供します。
はじめに、Ionic CLIの最新版をインストールしましょう。
npm install -g @ionic/cli@latest
これによって使えるようになった、グローバルコマンド ionic によって、Ionic Frameworkと他の依存関係を持つVueプロジェクトを作成することができます。新しいプロジェクトを作成するには、次のコマンドを実行します。
ionic start myApp blank --type vue
cd myApp
これで、 ionic serve を実行することによって、プロジェクトをブラウザで実行することができます。
私たちはTypeScriptが大好きで、スケールさせるアプリを構築するための素晴らしいツールだと確信しています。とはいえ、Vueコミュニティがいかにシンプルさを重視しているかは、ツールや言語などでわかっています。実際、そもそもVueに興味を持ったのはそのおかげかもしれません。シンプルに開始し、必要に応じてスケールアップします。
したがって、TypeScriptの代わりにJavaScriptを使うことができます。Ionic Vueアプリケーションを生成したら、次の手順を実行してください。
- TypeScriptの依存を削除:
npm uninstall --save typescript @types/jest @typescript-eslint/eslint-plugin @typescript-eslint/parser @vue/cli-plugin-typescript @vue/eslint-config-typescript
すべての .ts ファイルの拡張子を .js にします。blank Ionic Vueアプリでは、 router/index.ts と main.ts が該当します。
@vue/typescript/recommended と @typescript-eslint/no-explicit-any: ‘off’, を .eslintrc.js から削除します。
router/index.js から Array<RouteRecordRaw> を削除します。
shims-vue.d.tsファイルを削除します。
Vueコンポーネントにある script タグから lang="ts" を削除します。blank Ionic Vueアプリの場合、 App.vue と views/HomePage.vue が該当します。
アプリケーションのベースは src ディレクトリにあり、メインのエントリポイントは main.ts になります。エディタでプロジェクトを開き、main.ts を確認すると、次のように表示されます:
import { createApp } from 'vue';
import { IonicVue } from '@ionic/vue';

import App from './App.vue';
import router from './router';

const app = createApp(App).use(IonicVue).use(router);

router.isReady().then(() => {
  app.mount('#app');
});
So what is going on here? The first four lines are pulling in some dependencies. The createApp function lets us initialize our Vue application, while IonicVue is a plugin that allows us to use Ionic Framework in a Vue environment.
The third import is the root component for our app, simply named App. This is our first Vue component and will be used in the bootstrapping process for our Vue app.
The fourth import gets our routing configuration. We will look at this more in depth later.
App.vue を開くと、次のように表示されます:
<template>
  <ion-app>
    <ion-router-outlet />
  </ion-app>
</template>

<script setup lang="ts">
  import { IonApp, IonRouterOutlet } from '@ionic/vue';
</script>
scriptに書かれているimportのグループを分解してみていきましょう。
<script setup lang="ts">
  import { IonApp, IonRouterOutlet } from '@ionic/vue';
</script>
To use a component in Vue, you must first import it. So for Ionic Framework, this means anytime we want to use a Button or a Card, it must be added to our imports. In the case of our App component, we are using IonApp and IonRouterOutlet. Vue's script setup syntax gives the template access to those components as <ion-app> and <ion-router-outlet>.
You can also register components globally if you find yourself importing the same components repeatedly. This comes with performance tradeoffs that we cover in Optimizing Your Build.
次に、テンプレートを見てみましょう。
<template>
  <ion-app>
    <ion-router-outlet />
  </ion-app>
</template>
すべてのVueコンポーネントには <template> が必要です。その中に IonApp と IonRouterOutlet のコンポーネントを配置します。
Ionic Vueは内部的に vue-router を使用しているため、Vue Routerにすでに慣れている場合は、これまでの知識をIonic Vueのナビゲーションに適用できます。先ほど述べたルータの設定を見てみましょう。router/index.ts で次のように表示されます。
import { createRouter, createWebHistory } from '@ionic/vue-router';
import { RouteRecordRaw } from 'vue-router';
import HomePage from '@/views/HomePage.vue';

const routes: Array<RouteRecordRaw> = [
  {
    path: '/',
    redirect: '/home',
  },
  {
    path: '/home',
    name: 'Home',
    component: HomePage,
  },
];

const router = createRouter({
  history: createWebHistory(process.env.BASE_URL),
  routes,
});

export default router;
この例では、Ionic VueのBlank starterを使っているので、実際にみるrouteは少し違うかもしれません
ここでの設定は vue-router を直接使用する場合と同じですが、代わりに @ionic/vue-router パッケージから createRouter や createWebHistory などの依存関係をインポートする必要があります。
依存関係をインポートした後、 routes 配列に route を宣言できます。そこから、 routerインスタンスを作成し、routeと使用するhistoryのタイプを提供できます。
Ionic Vueでは、遅延ローディングはすぐに使うことができます。 Home コンポーネントをインポートする代わりに、次の操作を実行することもできます:
const routes: Array<RouteRecordRaw> = [
  {
    path: '/',
    redirect: '/home',
  },
  {
    path: '/home',
    name: 'Home',
    component: () => import('@/views/HomePage.vue'),
  },
];
Now, you might be wondering: Why do we use @ when describing the path to our components? The @ symbol is a shortcut we can use to describe paths relative to the src directory. This is useful if we are trying to reference a component while in a file several folders deep. Instead of doing '../../../views/HomePage.vue', we could simply do '@/views/HomePage.vue'.
ここでは、 App コンポーネントを変更する必要はあまりありません。コンテナコンポーネントの基本的な例です。ルータロジックを設定すると、指定されたURLルートに一致するコンポーネントをレンダリングするだけで済みます。すでに1つのコンポーネント/ルータが設定されているので、 Home コンポーネントを変更しましょう。
現在、 Home コンポーネントはこうなっています:
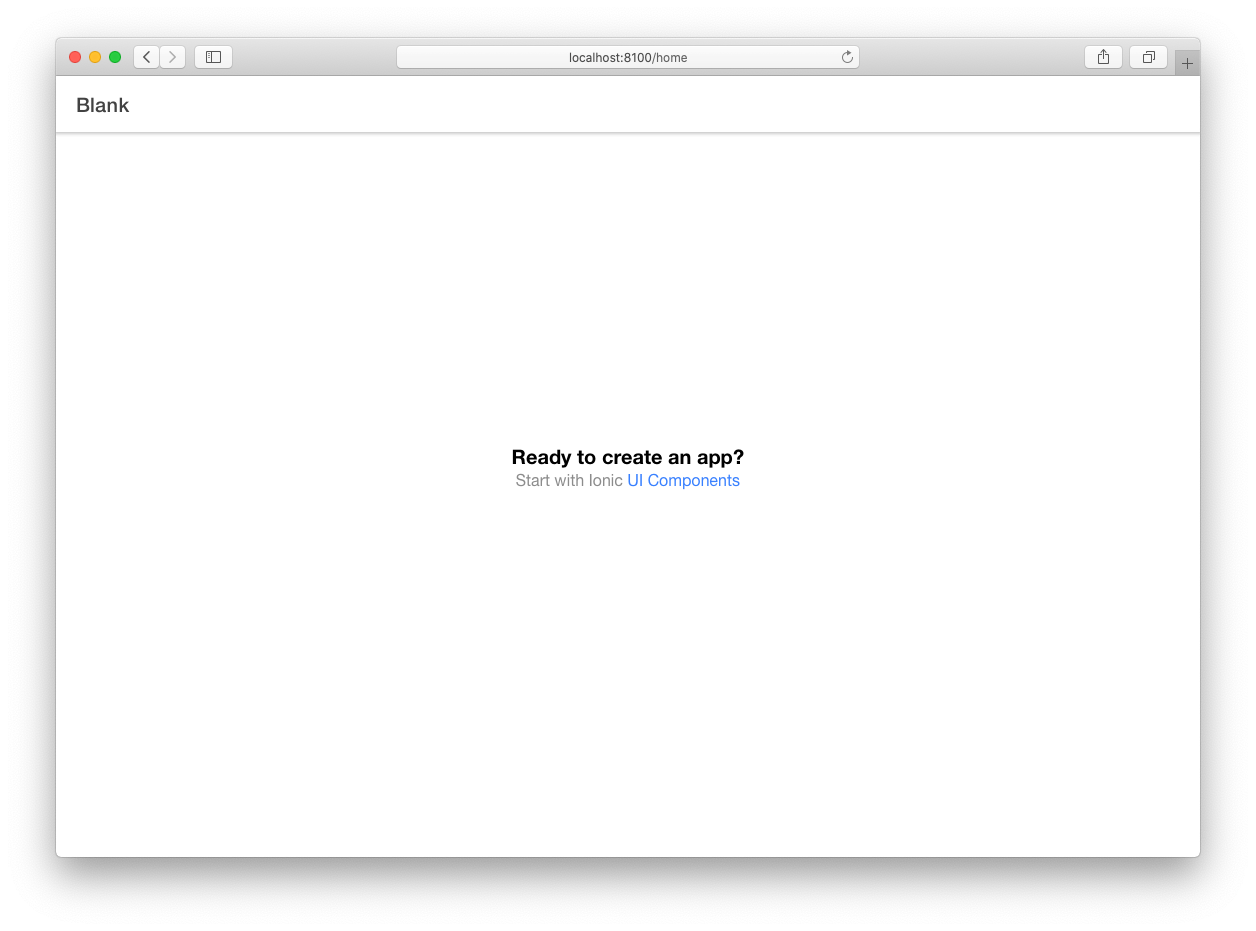
<template>
  <ion-page>
    <ion-header :translucent="true">
      <ion-toolbar>
        <ion-title>Blank</ion-title>
      </ion-toolbar>
    </ion-header>

    <ion-content :fullscreen="true">
      <ion-header collapse="condense">
        <ion-toolbar>
          <ion-title size="large">Blank</ion-title>
        </ion-toolbar>
      </ion-header>

      <div id="container">
        <strong>Ready to create an app?</strong>
        <p>
          Start with Ionic
          <a target="_blank" rel="noopener noreferrer" href="https://ionicframework.com/docs/components"
            >UI Components</a
          >
        </p>
      </div>
    </ion-content>
  </ion-page>
</template>

<script setup lang="ts">
  import { IonContent, IonHeader, IonPage, IonTitle, IonToolbar } from '@ionic/vue';
</script>

<style scoped>
  #container {
    text-align: center;

    position: absolute;
    left: 0;
    right: 0;
    top: 50%;
    transform: translateY(-50%);
  }

  #container strong {
    font-size: 20px;
    line-height: 26px;
  }

  #container p {
    font-size: 16px;
    line-height: 22px;

    color: #8c8c8c;

    margin: 0;
  }

  #container a {
    text-decoration: none;
  }
</style>
最初に確認した App コンポーネントと同様に、特定のIonic Frameworkコンポーネントのインポート、Vueからのインポート、Vueコンポーネント、そして私たちのコンポーネントに合わせたスタイルがあります。
スタイルに scoped を指定していることに注目してください。つまり、ここで記述するスタイルは、このコンポーネントにのみ適用されます。これは、スタイルがコンポーネントから漏れてアプリケーションの他の部分に影響するのを防ぐのに役立ちます。Ionic Vueアプリケーションでは、 scoped のついたスタイルを使用することを強くお勧めします。
IonPage はすべてのページ(route/URLを持つコンポーネント)の基本コンポーネントであり、header, title, contentコンポーネントなど、フルスクリーンコンポーネントの一般的な構成要素がいくつか含まれています。
独自のページを作成する場合は、 IonPage をそのルート・コンポーネントにすることを忘れないでください。 IonPage をルートコンポーネントにすることは、Ionic Frameworkコンポーネントが依存するベースCSSを提供するだけでなく、トランジションが適切に動作することを保証するために重要です。
IonHeader は、ページの先頭に配置されるコンポーネントです。これは、フレックスボックスベースのレイアウトを処理する以外には、単独ではあまり機能しません。これは、IonToolbar や IonSearchbarなどのコンポーネントを保持するためのものです。
IonContent は、その名前が示すように、ページのメインコンテンツ領域です。ユーザーが操作するスクロール可能なコンテンツと、アプリで使用できるスクロールイベントを提供する役割を担っています。
現在のコンテンツは比較的シンプルで実際のアプリで使えるものは何も入っていないので、それを変えましょう。
簡潔に表記するために、関数宣言や他のコンポーネントからのインポート文など、コンポーネントの繰り返し部分を除外します。
<template>
  <ion-page>
    ...
    <ion-content>
      <ion-list>
        <ion-item>
          <ion-checkbox slot="start"></ion-checkbox>
          <ion-label>
            <h1>Create Idea</h1>
            <ion-note>Run Idea By Brandy</ion-note>
          </ion-label>
          <ion-badge color="success" slot="end"> 5 Days </ion-badge>
        </ion-item>
      </ion-list>
    </ion-content>
  </ion-page>
</template>

<script setup lang="ts">
  import { IonBadge, IonCheckbox, IonContent, IonHeader, IonItem, IonLabel, IonList, IonNote, IonPage, IonTitle, IonToolbar } from '@ionic/vue';
</script>
ここでは、 IonContent に IonList と IonItem コンポーネントを追加します。ここでは IonItem を中心に説明します。
<ion-item>
  <ion-checkbox slot="start"></ion-checkbox>
  <ion-label>
    <h1>Create Idea</h1>
    <ion-note>Run Idea By Brandy</ion-note>
  </ion-label>
  <ion-badge color="success" slot="end"> 5 Days </ion-badge>
</ion-item>
コードを見ると、 slot という特殊な属性があります。これは、レンダリング時に IonCheckbox を配置する場所を IonItem に知らせるためのキーです。これはVue APIではなく、Web標準APIです。また、Vue 2のslot APIとは異なります。
Ionic Frameworkの別のコンポーネントであるFAB(フローティング・アクション・ボタン)を見てみましょう。FABは、アプリケーションの他の部分よりも上位のメイン・アクションを提供する優れた方法です。このFABには、FAB、FABボタンおよびアイコンの3つのコンポーネントが必要です。
<template>
  <ion-page>
    <ion-content>
      <ion-list> ... </ion-list>

      <ion-fab vertical="bottom" horizontal="end" slot="fixed">
        <ion-fab-button>
          <ion-icon :icon="add"></ion-icon>
        </ion-fab-button>
      </ion-fab>
    </ion-content>
  </ion-page>
</template>

<script setup>
  import { IonBadge, IonCheckbox, IonContent, IonFab, IonFabButton, IonHeader, IonIcon, IonItem, IonLabel, IonList, IonNote, IonPage, IonTitle, IonToolbar } from '@ionic/vue';
  import { add } from 'ionicons/icons';
</script>
メインの IonFab では、縦方向と横方向の属性(vertical/horizontal)で表示位置を設定しています。また、slot属性を使用して、レンダー位置を"fixed"に設定します。これにより、 IonContent 内のスクロール可能なコンテンツの外側でレンダリングするよう IonFab に指示します。
次に、これにクリックハンドラを設定します。FABボタンをクリックすると、新しいページ(この後、すぐに作成します)に移動します。これを行うには、Vue RouterのナビゲーションAPIにアクセスする必要があります。これは useRouter パッケージから vue-router をインポートすることで実現できます。
<template>
  <ion-page>
    <ion-content>
      <ion-list> ... </ion-list>

      <ion-fab vertical="bottom" horizontal="end" slot="fixed">
        <ion-fab-button @click="() => router.push('/new')">
          <ion-icon :icon="add"></ion-icon>
        </ion-fab-button>
      </ion-fab>
    </ion-content>
  </ion-page>
</template>

<script setup>
  import { add } from 'ionicons/icons';
  import { useRouter } from 'vue-router';
  const router = useRouter();
</script>
このコンポーネントファイルでは、 useRouter 関数をインポートしています。この関数を呼び出すと、コンポーネントからルーティングを操作することができます。つまり、Vue Routerから履歴APIにアクセスし、新しいrouteをナビゲーションスタックにプッシュすることができます。利用方法は IonFabButton にクリックイベントを追加し、router.push を呼び出すだけです。この場合、私たちは /new というrouteにナビゲーションします。
<ion-fab-button @click="() => router.push('/new')"> ... </ion-fab-button>
これで、アプリケーション内をナビゲートするための環境が整ったので、新しいコンポーネントを作成し、新しいrouteをルーターの宣言に追加する必要があります。 router/index.ts を開いて、 new のrouteを追加します。
import { createRouter, createWebHistory } from '@ionic/vue-router';
import { RouteRecordRaw } from 'vue-router';
import HomePage from '@/views/HomePage.vue';
import NewItem from '@/views/NewItem.vue';

const routes: Array<RouteRecordRaw> = [
  {
    path: '/',
    redirect: '/home',
  },
  {
    path: '/home',
    name: 'Home',
    component: HomePage,
  },
  {
    path: '/new',
    name: 'NewItem',
    component: NewItem,
  },
];

const router = createRouter({
  history: createWebHistory(process.env.BASE_URL),
  routes,
});

export default router;
routeに /new を追加したので、該当するコンポーネントとなる NewItem を作成します。これは views/NewItem.vue に作成します。
新しく NewItem.vue ファイルを作成します。
<template>
  <ion-page>
    <ion-header>
      <ion-toolbar>
        <ion-buttons slot="start">
          <ion-back-button></ion-back-button>
        </ion-buttons>
        <ion-title>New Item</ion-title>
      </ion-toolbar>
    </ion-header>
    <ion-content></ion-content>
  </ion-page>
</template>

<script setup lang="ts">
  import { IonBackButton, IonButtons, IonContent, IonHeader, IonPage, IonTitle, IonToolbar } from '@ionic/vue';
</script>
Each view must contain an IonPage component. Page transitions will not work correctly without it. See the IonPage Documentation for more information.
ここでの内容は、 Home コンポーネントに似ています。異なるのは、 IonBackButton コンポーネントです。これは、前のrouteに戻るために使用されます。簡単でしょ?わかりました、でもページをリロードしたらどうなりますか?
この場合、インメモリ内から履歴は失われるため、 戻るボタンは表示されません。この問題を解決するには、 default-href 属性値を、履歴がない場合にナビゲートするURLに設定します。
<ion-back-button default-href="/home"></ion-back-button>
これで、アプリの履歴がない場合も、home routeに戻るための戻るボタンを表示することができます。
In order to call a method on any of the Ionic Vue components, you will first need to get a reference to the component instance. Next, you will need to access the underlying Web Component using $el and call the method.
In other framework integrations such as Ionic React, this is not needed as any ref you provide is automatically forwarded to the underlying Web Component instance. We are unable to do the same thing here due to limitations in how Vue manages refs.
<template>
  <ion-content ref="content">
    <ion-button @click="scrollToBottom">Scroll to Bottom</ion-button>

    ...
  </ion-content>
</template>

<script setup lang="ts">
  import { IonButton, IonContent } from '@ionic/vue';
  import { ref } from 'vue';

  const content = ref();
  const scrollToBottom = () => {
    content.value.$el.scrollToBottom(300);
  };
</script>
Ionic Vueには Ionicons がプリインストールされています。開発者がアプリケーションで使用できるオプションはいくつかあります。
Per-Component Imports is the recommended approach to using Ionicons. This involves importing the icon of your choice from the ionicons package and passing it to your template:
<template>
  <ion-page>
    <ion-content>
      <ion-icon :icon="heart"></ion-icon>
    </ion-content>
  </ion-page>
</template>

<script setup>
  import { heart } from 'ionicons/icons';
  import { IonContent, IonIcon, IonPage } from '@ionic/vue';
</script>
ここでやっていることを詳しく説明しましょう。まず、 heart のアイコンを ionicons/icons からインポートします。これにより、アイコンの適切なSVGデータがロードされます。
Then we pass the icon data into the ion-icon component via the icon property.
開発者は、モードに応じて異なるアイコンを設定することもできます:
<template>
  <ion-page>
    <ion-content>
      <ion-icon :ios="logoApple" :md="logoAndroid"></ion-icon>
    </ion-content>
  </ion-page>
</template>

<script setup>
  import { logoAndroid, logoApple } from 'ionicons/icons';
  import { IonContent, IonIcon, IonPage } from '@ionic/vue';
</script>
Note: これらのアイコン名は、読み込み時にはキャメルケースで読み込む必要があります。
もう1つのオプションは、特定のアイコンをグローバルにインポートすることです。アプリケーションを起動するたびにアイコンが強制的にロードされ、アプリケーションの初期チャンク・サイズが大きくなる可能性があるため、通常は推奨しません。
とはいえ、特定のアイコンをグローバルにロードすることに意味があるユースケースがあるかもしれません:
main.ts
import { addIcons } from 'ionicons';
import { heart } from 'ionicons/icons';

addIcons({
  heart: heart,
});
HomePage.vue
<template>
  <ion-page>
    <ion-content>
      <ion-icon icon="heart"></ion-icon>
    </ion-content>
  </ion-page>
</template>

<script setup>
  import { IonContent, IonIcon, IonPage } from '@ionic/vue';
</script>
main.ts で addIcons 関数を利用すると、アイコンをグローバルに登録し、キーとして文字列で指定することができます。この場合、 Home コンポーネントでキーでアイコンを参照します。
Vueには、アプリケーションを調整するためのツールがいくつか用意されています。このセクションでは、Ionic Frameworkに最も関連するオプションについて説明します。
デフォルトでは、Ionic Frameworkコンポーネントはローカルに登録されます。ローカルでの登録では、これらのコンポーネントはそれぞれのVueコンポーネントにインポートされ、提供されます。これは、遅延読み込みとツリーの共有がIonic Frameworkコンポーネントで正しく動作するため、推奨される方法です。
この方法の1つの欠点は、Ionic Frameworkコンポーネントを何度もインポートし直すのが面倒なことです。しかし、その見返りとして得られるパフォーマンス上のメリットには価値があると考えています。
また、ローカルに登録されたコンポーネントはサブコンポーネントでは使用できません。サブコンポーネントで使用するためには、Ionic Frameworkコンポーネントを再インポートする必要があります。
ローカルコンポーネント登録の仕組みを見てみましょう:
<template>
  <ion-page>
    <ion-content>
      <SubComponent></SubComponent>
    </ion-content>
  </ion-page>
</template>

<script setup lang="ts">
  import { IonContent, IonPage } from '@ionic/vue';
  import SubComponent from '@/components/SubComponent.vue';
</script>
In the example above, we are using the IonPage and IonContent components. To use them, we import them from @ionic/vue. From there, we can use the components in our template.
Note that since we are registering these components locally, neither IonPage nor IonContent will be available in SubComponent unless we register them there as well.
詳細については、Local Registration Vue Documentation のマニュアルを参照してください。
コンポーネントを登録するためのもう1つのオプションは、グローバル登録を使用することです。グローバル登録には、 main.ts で使用するコンポーネントをインポートし、Vueアプリインスタンスでcomponent メソッドを呼び出すことが含まれます。
これにより、VueアプリにIonic Frameworkコンポーネントを追加するのは簡単になりますが、グローバル登録は理想的ではありません。Vueのドキュメントを引用すると、「Webpackなどのビルドシステムを使用している場合、すべてのコンポーネントをグローバルに登録すると、コンポーネントの使用を停止しても、最終ビルドに含めることができます。これにより、ユーザーがダウンロードしなければならないJavaScriptの量が不必要に増加します」とあります。
グローバルコンポーネント登録の仕組みを見てみましょう:
main.ts
import { IonContent, IonicVue, IonPage } from '@ionic/vue';

const app = createApp(App).use(IonicVue).use(router);

app.component('ion-content', IonContent);
app.component('ion-page', IonPage);
MyComponent.vue
<template>
  <ion-page>
    <ion-content>
      <SubComponent></SubComponent>
    </ion-content>
  </ion-page>
</template>

<script setup lang="ts">
  import SubComponent from '@/components/SubComponent.vue';
</script>
上の例では、 IonPage コンポーネントと IonPage コンポーネントを使用しています。これらを使用するには、まず main.ts の @ionic/vue からインポートします。次に、appインスタンスで component メソッドを呼び出し、タグ名とコンポーネント定義を渡します。これを行うと、各Vueコンポーネントにコンポーネントをインポートしなくても、アプリケーションの残りの部分でコンポーネントを使用できます。
詳細については、Global Registration Vue Documentation のドキュメントを参照してください。
デフォルトでは、Vue CLIはアプリケーション内のJavaScriptのプリフェッチ・ヒントを自動的に生成します。プリフェッチでは、ブラウザのアイドル時間を利用して、ユーザーが近い将来にアクセスする可能性のある文書をダウンロードします。ユーザーがプリフェッチされたドキュメントを必要とするページにアクセスすると、ブラウザのキャッシュからすぐに提供できます。
プリフェッチは帯域幅を消費するため、大規模なアプリケーションを使用している場合は無効にすることをお勧めします。これを行うには、vue.config.jsファイルを変更または作成します:
vue.config.js
module.exports = {
  chainWebpack: (config) => {
    config.plugins.delete('prefetch');
  },
};
The configuration above will prevent all files from being prefetched and, instead, will be loaded when they are needed. You can also select certain chunks to prefetch. Check out the Vue CLI Docs on Prefetching for more examples.
We now have the basics of an Ionic Vue app down, including some UI components and navigation. The great thing about Ionic Framework’s components is that they work anywhere, including iOS, Android, and PWAs. To deploy to mobile, desktop, and beyond, we use Ionic’s cross-platform app runtime Capacitor. It provides a consistent, web-focused set of APIs that enable an app to stay as close to web-standards as possible while accessing rich native device features on platforms that support them.
Adding native functionality is easy. First, add Capacitor to your project:
ionic integrations enable capacitor
次に、プロジェクトをビルドしてから利用するプラットフォームを選択します:
ionic build
ionic cap add ios
ionic cap add android
iOSとAndroidのプロジェクトを開いたり、ビルド、実行するのに、ネイティブのIDE(Xcode と Android Studio)を使います:
ionic cap open ios
ionic cap open android
詳細は こちら をご覧ください。
次に、 すべての利用可能なAPIs を確認します。Camera API を含むすばらしい機能があります。以下の数行のコードでカメラ機能を実装することができます¥:
<template>
  <ion-page>
    <ion-header>
      <ion-toolbar>
        <ion-title>Ionic Blank</ion-title>
      </ion-toolbar>
    </ion-header>
    <ion-content class="ion-padding">
      <img :src="imageSrc" />
      <ion-button @click="takePhoto()">Take Photo</ion-button>
    </ion-content>
  </ion-page>
</template>

<script setup lang="ts">
  import { IonButton, IonContent, IonHeader, IonPage, IonTitle } from '@ionic/vue';
  import { ref } from 'vue';
  import { Camera, CameraResultType } from '@capacitor/camera';

  const imageSrc = ref('');
  const takePhoto = async () => {
    const image = await Camera.getPhoto({
      quality: 90,
      allowEditing: true,
      resultType: CameraResultType.Uri,
    });

    imageSrc.value = image.webPath;
  };
</script>
このガイドでは、Ionic Vueアプリの作成の基本、基本的なナビゲーションの追加、ネイティブアプリを構築する方法としてのCapacitorの紹介について説明した。VueとCapacitorを使って完全なIonic Frameworkアプリを構築するには、我々の First App guide をご覧ください。
Ionic Frameworksのコンポーネントの詳細については、 component API pages を参照してください。Vueの詳細については、 Vue Docs を参照のこと。ネイティブ機能の構築を続けるには、Capacitor docs を参照してください。
アプリ構築をお楽しみください! 🎉